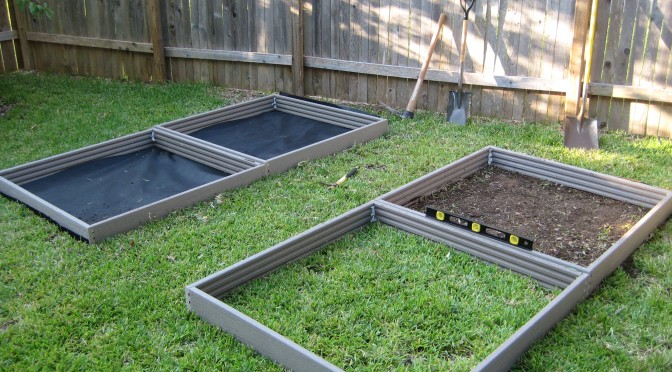
One of the easiest and most efficient ways to grow fresh vegetables, while optimizing your available gardening space, is by utilizing Square Foot Gardening, developed by Mel Bartholomew.
Raised Beds
Rather than digging down into your existing soil, use raised beds. Each raised bed is 4′ wide by 4′ long and 6″ deep. Keeping the beds no wider than 4′ makes it easy to reach anywhere in the raised bed easily. I construct each one out of a single 16′ x 6″ composite decking plank (around $29) cut into four equal length pieces and screwed together at each corner. I avoid pressure treated lumber due to the chemicals it contains and untreated lumber will rot in just a few years.
Once each bed is constructed, place it in an area that receives full sun. You can place two or more beds together to form rows if space permits. Be sure to leave at least 3′ between each row of beds to allow easy access. Once your bed layout is determined, remove any existing grass within each bed and level each one. Now staple a piece of weed blocker fabric to the bottom of each bed and place the beds in their final positions.
The Soil
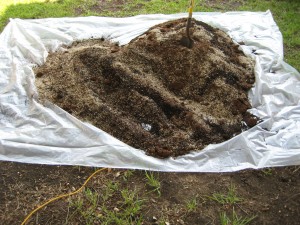 You are now ready for the key component of your raised bed, the soil. Rather than trying to weed, till, and amend the existing soil in your yard, you will make our own custom mixture. This mixture, Mel’s Mix, consists of 1/3 Coarse Vermiculite, 1/3 Peat Moss, and 1/3 Compost. It is this soil that allows you to grow your vegetables in only a 6″ deep bed.
The components are measured by volume in cubic feet. Each 4′ x 4′ bed requires 8 cubic feet of soil. Be aware that a 3.9 cubic foot bale of Peat Moss equals 8 cubic feet loose. Try to use several different types of compost to make up the compost portion of your soil mix. Different compost brands are derived from different sources, ex. chicken waste, cow waste, etc. Once you have your components, Lay a tarp on the ground near your raised beds, dump your ingredients on it and mix thoroughly. Once mixed, fill your bed(s).
Drip Irrigation Grid
 The next key technique used in Square Foot Gardening is placing a permanent 12 x 12-inch grid over each raised bed. The fully grown size of each plant determines how many can be grown in each square. You can use strips of wood or string to make these grids but I chose to install drip irrigation lines to use as both my grid and to optimize the watering of the beds.
I installed a closed loop of 1/2″ Black Polyethylene Drip Irrigation Tubing around the perimeter of each row of beds.
At the corner closest to your water source, use a 1/2″ Tee Fitting.
At the next two corners, use 1/2″ Elbow Fittings.
At the forth corner, closest to your next row of beds, use another 1/2″ Tee Fitting and run a length of 1/2″ Black Polyethylene Drip Irrigation Tubing to the Tee Fitting on the next row of beds.
At the fourth corner, closest to your next row of beds, use another 1/2″ Tee Fitting and run a length of 1/2″ Black Polyethylene Drip Irrigation Tubing to the Tee Fitting on the next row of beds.
Next, I ran 1/4″ In-Line drip tubing across the length and width of each bed, spaced at 1′ intervals, and connected these to both sides of the 1/2″ Black Polyethylene Drip Irrigation Tubing around the perimeter.

I decided to install and use a Rain Water Harvesting System, discussed in detail in a future post, to connect to my Drip Irrigation System. A garden hose from an outdoor faucet will work just fine but be sure to install a Pressure Regulator.
Grow Vertically
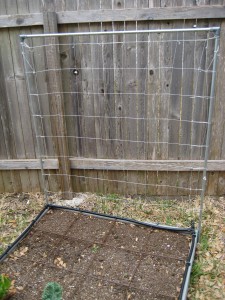 Many vegetables such as pole beans, peas, cantaloup, and even tomatoes can be grown on a vertical trellis made out of 1/2″ electrical conduit and nylon trellis netting.
I made mine 6′ high and 4′ wide. Drive a piece of 1/2″ rebar, that is about 18″-24″ long, halfway into the ground at each of the two corners where the trellis will be placed. Then just slip the conduit over each piece of rebar to hold the trellis in place.
The electrical conduit comes in 10′ lengths (around $2 each) and your local home improvement store can cut it to the desired length. The nylon trellis netting can also be found at your local home improvement store or garden center.
Ready to Plant
Check out All New Square Foot Gardening: Grow More in Less Space! by Mel Bartholomew for specific information on the the number of each type of vegetable to plant per square and other great information.
I hope you find this post useful and that you try these techniques for yourself. Enjoy.

